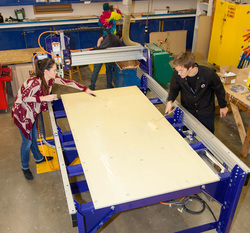
Now that we have the machine itself constructed, it is time to put the build surface together. We used a sheet of Baltic Birch ply for the base, bolted to the machine bed. Then it was all about rolling a ton of glue over the surface for a sheet of 3/4" MDF to stick to. We had a little difficulty in getting the MDF to align perfectly with the underlayment (actually, it didn't align up too well at all) but I guess we learned a few things at the least. We used our new composite nail gun from Raptor to secure the corners and then it was all about throwing some weight around.
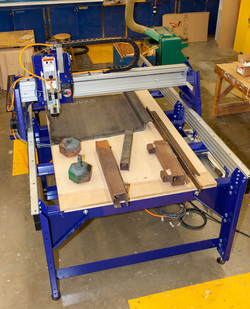
Thank you Mr. Leair for all of the scrap steel! We placed some heavy sheet goods on the MDF and then proceeded to carry a ton (literally) of scrap steel all over the bed to keep it flat while the glue dried. It worked for the most part but we did notice after the fact that there were a couple of places that the edges did not get glued down tight. Not to worry too awful much since we believed that the spoilboard surfacing should eliminate any issues.
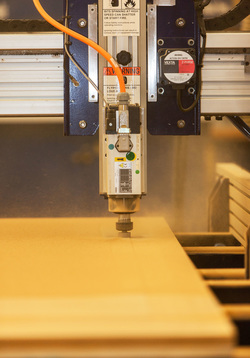
Yeah, I know. If we only had the dust collection hooked up before surfacing the spoilboard. We live in a fairly rural area of the state and getting your hands on 4" dust collection flex hose seems to require perfect planet alignment in concert with very specific dew points along with the presence of 3 young goats and a mangy old feral cat. Don't really understand that but...Anyway, the spoilboard is surfaced and we got all of the dust cleaned up.
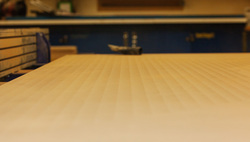
As you may be able to see from the image to the right, we do have some ridges from the surfacing. This means that the spindle is not perfectly square to the table. Truth be told, these ridges probably look worse than they actually are. You can barely feel them with a fingernail. Nice thing about the table being surfaced is that now you can get a square on it and really get the spindle perfectly aligned. The ridges are not significant enough to warrant a re-surfacing right now so we are finally ready to begin cutting some parts!
 RSS Feed